all data is live and searchable
« Back .
[Adilas youtube training videos for me] .
[Adilas steps to success - user guide (under construction)]
. [Adilas "quick search" help]
[Adilas university] . [all Adilas help files] . [developer's notebook] . [Adilas web/api documentation] . [contact Adilas support - email form]
[online glossary] . [presentation gallery - outline]
[Adilas university] . [all Adilas help files] . [developer's notebook] . [Adilas web/api documentation] . [contact Adilas support - email form]
[online glossary] . [presentation gallery - outline]
More info below the graphic...
|
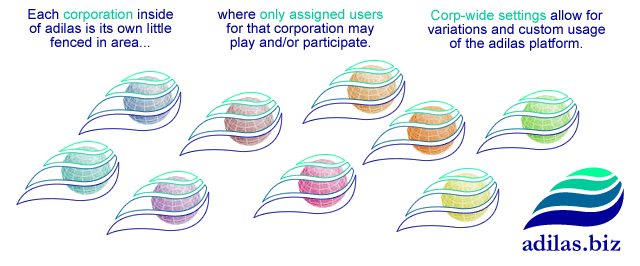
Corporation-Wide Settings And Defaults
|
|
This page is setup to help manage the corporation-wide settings and defaults. These settings will be reflected on the respective pages and reports. It is important to note that these settings are not retro-active (going back in time). Most of these settings deal with new items that are added to the database and/or display verbage. Settings that are disabled are still under construction and will be activated as soon as they are complete. If you have a need for a setting or have an idea for something that would help out the Adilas system, contact support by email: support@adilas.biz
Additional help for the different sections: The page starts with the corporation id number and corporation name. These settings are controlled on a different page and passed in to make sure you are setting up the correct defaults for the correct corporation. 1. Default Entity Name - Required. This is a field where you may hold the default entity name. The system default is "Corporation". The Max field length is 50 chars and min of 3 chars. 2. Abbreviated Entity Name - Required. This is a shortened version on the main entity name. The system default is "Corp". Max of 15 chars and min of 3 chars. 3. Default Location Title Name - Required. This is where you may change the location title. The system default is "Location". Max of 50 chars and min of 3 chars. 4. Abbreviated Location Title - Required. This is a shortened version of the main location title. The system default is "Loc". Max of 15 chars and min of 1 char. 5. Location License Title - Required. This is a dynamic title for the license field in the locations table. If used or set per location, it (this value plus the value entered per location) will show up on all printable invoices, quotes, and PO's. Max of 50 chars and a min of 1 char. It is called the "Location License Number" field but it could be any special location or store value that needs to show up on the invoices, quotes, and PO's. If nothing is entered on the location table, this title value will be skipped and will not show up. 6. Default Salesperson Title Name - Required. This is the title of who gets assigned to an invoice or quote. The system default is "Salesperson". The max is 50 chars and the min is 2 chars. 7. Abbreviated Salesperson Title - Required. This is the shortened version of the salesperson title name. The system default is the same as the main title but may be shortened if needed. The default is "Salesperson". The max is 15 chars and the min is 1 char. 8. Default Customer Title Name - Required. This is where you can name what you call your customers. The system default is "Customer". The max is 50 chars and the min is 2 chars. 9. Abbreviated Customer Title - Required. This is the shortened version of the customer title. The system default is "Cust". The max is 15 chars and the min is 1 char. 10. Customer Tax Id Title - Required. This is a dynamic title value for a single field that is stored per customer. If used, meaning actually entered per customer, this value will show up on printable invoices, quotes, and shopping carts. It will also show up as a field on the main customer information or log page. The default name is "Customer Tax Id" but may be switched to whatever is needed. Basically, this is the title for a special field that is stored per customer that helps hold specific data like reference numbers, other id numbers, license values, other identifiers. There is a max of 50 chars for this title and a min of 1 char. 11. Customer Start Date Title - Required. This is where you record the caption or title for the customer start date. The title allows you to name the date field. It does not need to be related to an actual start date. This is one of four custom date fields for customers. There is a max of 50 chars and a minimum of 1 char. Note: This field, on a per customer level, is required. This is the only required date field of the four custom date fields for customers. 12. Customer End Date Title - Required. This is the second of four custom date fields for customers. There is a max of 50 chars and a min of 1 char. 13. Period Start Date Title - Required. This is the third of four custom date fields for customers. There is a max of 50 chars and a min of 1 char. 14. Period Expiration Date Title - Required. This is the fourth of four custom date fields for customers. This one has some special code attached, if used. The system is setup to watch for dates (on the customer level) that are less than the current date. If yes, the system will show the recorded date values in red and will have the word "Caution" to help show that the recorded date is in the past. Other than that, this date field is just the fourth of four custom fields. The title or caption has a max of 50 chars and a min of 1 char. 15. Default Customer Terms - Optional. This is where you record what your company uses as the default terms for a customer. The system default is "Net 15". The max is 50 chars and may be left blank if needed. 16. Customer Queue Settings - Required. This section actually has four (4) different settings. The first setting is a toggle switch of whether or not to use the queue. This next setting basically deals with what to call the queue or virtual waiting room. There is a max of 50 chars and a min of 1 char. The next setting is an abbreviated or shortened form of what to call it. This setting has a max of 15 chars and min of 1 char. The last setting deals with the auto flush or auto clean-up rate. Basically, this deals with helping to clear or clean out records that are not used. The default is clean out unused queue records "every 2 hours" but may be set to things like: never - manual removal only, every 30 minutes, every 4 hours, every 12 hours, etc. 17. Customer Invoice Name - Required. This is what you call your main invoice that is assigned to your customers. The system default is "Customer Invoice". The max is 50 chars and the min is 2 chars. 18. Abbreviated Customer Invoice Name - Required. This is a shortened version of the customer invoice. The system default is "Customer". The max is 15 chars and the min is 1 char. 19. Transition Invoice Name - Required. This is what you call your transition invoices (work orders, layaways, work in progress, etc.). You are not required to use transition invoices but you do need a setting for them. The system default is "Transition Invoice". The max is 50 chars and the min is 2 chars. 20. Abbreviated Transition Invoice Name - Required. This is the shortened version of the transition invoice name. The system default is "Q.T.I." which stands for quote, transition, invoice. The max is 15 chars and the min is 1 char. 21. Limited Format Invoice Name - Required. This is what you call the invoice view that only has customer, location, items, and quantities. No prices are displayed on this format. The max is 50 chars and the min is 2 chars. 22. Invoice/Quote Thank You Line - Optional. This is where you can tell your customers thank you on all invoices and quotes. The system default is "Thank you for your business!". The max is 100 chars and it is ok to leave blank if you want to skip this setting. 23. Show Signature Line 1 - Required. This is a multi-step setting. The first part deals with hide/show value of the signature line. The second part deals with the caption for the actual line. The system default is "Show" and "Signature". The max on the caption or text is 50 chars and the min is 2 chars. The checkboxes are show/hide features for different invoice views. 24. Show Signature Line 2 - Required. This is a multi-step setting. The system default is set to "Hide" and "Signature". See above for more details. 25. Invoice Extra Verbage 1 - Optional. This is where you can put extra verbage or text at the bottom of every invoice. The system default is "Returns, if applicable, may require receipt and restocking fee." The max is 150 chars and may be left blank if needed. 26. Invoice Extra Verbage 2 - Optional. See above for more detail. Max of 150 chars and may be left blank. 27. Invoice Extra Verbage 3 - Optional. See above for more detail. Max of 150 chars and may be left blank. 28. Invoice/Quote Disclaimer Settings - Optional. These settings deal with an unlimited field where custom verbage or text may be entered. The show setting (drop-down box above the text field) helps the application show the disclaimer either as a standalone page or in an in-line (on every ticket) fashion. The in-line setting will make the disclaimer show up on every invoice or quote. The standalone setting will allow the disclaimer to be accessed if needed but it will not print it out automatically on the bottom of all quotes and invoices. The actual text value has the capability to hold basic HTML tags for things like line breaks, bold, italics, etc. See the HTML help file for more details and pointers about basic HTML code. 29. Default Printable Invoice - Required. Choose a default printable invoice. This deals with what page view (invoice mode) to show when converting from a cart to an actual invoice. 30. External PO # on Invoice - Required. This is an extra field for invoices and quotes. By default, it is designed for the customer PO number. However, it may be used for whatever your corporation needs as an extra call-out field. The copy and verbage section has a max of 50 chars and min of 2 chars. The default for this section is "Customer PO #". The form control below the verbage section helps the application know if you want to use the extra field or not. The default is "Don't Use". 31. Cart Checkout Options - Optional. There are three different settings here. One is for the default money type being set to "Cash". The second setting deals with how many payment options there are for the checkout process. The third option deals with skipping or showing the final confirmation step in the sales process. The default is show/use. 32. CC Payment Mode - Optional. Choose from the list provided. This setting will only take affect on the secure credit card payment page. Depending on the setting, the page will be ready to take a swiped card value or a manually keyed card entry. 33. Auto Calc Switch - Optional. Choose from the list provided. This setting only applies to the advanced add to cart page and deals with a small checkbox switch that turns on/off the auto calculations for that page. The default is turned on (meaning do the auto calc or change the numbers in a live mode). The setting may be switched to turned off if the corporation has a need. The off status only temporarily disables the auto calculations. Before the page is submitted, the auto calc switch must be turned on otherwise the page will not be used (this switch also disables the main submit button). One of the biggest advantages of turning the switch off, is that the page may be integrated with a digital scale. Most scales will write to the quantity field and try to submit the page. By turning the auto calc switch to off, the user may use the scale and check other settings before submitting. 34. Cart Quick Search Drop-Down - Required. There are five different cart quick search options to choose from. These values are tied to the cart quick search form on the main view cart page. The value "Part Numbers" is required. If the only value selected is "Part Number", the drop-down option will be hidden (default). All other options are available but not required. If you add them, a physical drop-down option will appear inside the main view cart page. Feel free to click and choose as many options as needed. The other options are: flex grid tie-ins, recipe/builds, cart favorite buttons, and barcodes (mixed sources). The barcode search option will actually search all barcode values for the other application types (other four system players listed). If you need more information about the mixed sources barcode search, see this help file. 35. Barcode Options - Optional. There are two different settings in this section. The top one deals with a thing we call the "barcode quick cart". This is point of sale (POS) option for corporations who use barcodes as part of the checkout and invoice process. If checked, the system will automatically add one item to the cart when the barcode is scanned. The system will look for an open cart and a perfect match between the barcode in the database and the barcode that was scanned. If yes, the item will be added to the current open cart. The other option deals with the default barcode label size for printing out barcodes. 36. Settings For Elements Of Time - These are the settings for the elements of time homepage. The settings used here will be used if not explicitly passed to the page. Think of them as the defaults. The settings are as follows: 1. Default Time Period (default=monthly), 2. Default Report Type (default=calendar view), 3. Default Calendar Block Size (default=medium), 4. Default Time Slot Start/Stop Range (default=6:00 am to 8:00pm), 5. Default Time Slot Block Size (default=30 minutes), and 6. Show/Hide Extra Stats & Subs (default=hide). 37. Default Customer Search Type - Required. Choose from the list provided. This deals with the default for the customer search types. The system default is "Any Name (general)". 38. Default Vendor/Payee Search Type - Required. Choose from the list provided. This deals with how vendors and payees are searched. The system default is "Any Name (general)". 39. Default Parts Section Name - Required. This is where you get to call your general inventory items (tracked as a group) what you would like. The system default is "Parts". The max is 50 chars and the min is 2 chars. 40. Abbreviated Parts Section Name - Required. This is the shortened version of the general inventory section name. The system default is "Part" (singular). The max is 15 chars and the min is 1 char. 41. Title for Parts - This is a custom title that will show up on the income statement (P&L) and the balance sheet for the parts and general inventory sections. This is also the default general permission name for parts and general inventory section. The phrase "Homepage" will be added to the permission name. Max of 100 chars and minimum of 2 chars. 42. Default Part Number Name - Required. This is a sub category for the general parts section. This deals with what the actual part or item is called. The system default is "Part Number". The max is 50 chars and the min is 2 chars. 43. Abbreviated Part Number Name - Required. This is a shortened version of the part number. The system default is "Part". The max is 15 and the min is 1 char. 44. Inventory Tracking - Required. This setting deals with how strict the system is at allowing cross location quoting and invoicing. The default is "Location Specific" which is considered more ridged on keeping accurate in and out quantities per location. If you want to move items from one location to another, this must be done by an internal transfer invoice. The other setting is called "General or Global" which refers to a corp-wide methodology of inventory tracking. Basically, this setting allows any location to quote and invoice any item that is in the system regardless of its physical location. This is considered a looser tracking system. 45. Default Tax Category - Required. Choose a tax category from the list provided. This settings only shows up when adding new parts and when adding a new customer. The system default is set to "Taxable". 46. Show/Hide Tax Category - Required. Choose from the list provided. This setting helps to either show or hide the tax category on invoices, printable carts, and quotes. 47. Show/Hide Tax Breakdowns - Required. Choose from the list provided. The options are hide tax breakdowns (default - just show the grab total tax amount as a single line item) and show tax breakdowns (sum up individual taxes and show the break-down). 48. Number of Decimal Points - Required. Choose the default number of decimals to show. The default is two (2) decimals. The system is capable of using, storing, and showing up to five (5) decimal places. This setting is tied to pricing of items. See the example on the corp-wide setting page for a full explanation. 49. Default Parts Mark-Up - Required. This is the default mark-up value for the parts page. This setting only shows up when adding a new part number to the system. The number must be a positive value. The default is 1.85 or an 85% mark-up. 50. Allow/Show Parts Conversions - Required. Choose an option from the list provided. The parts conversions allow a user to interact with parts on a weight/measurement level as compared with a quantity level. Some examples of a conversion might be: 1 pound = 2,700 widgets, 1 case = 12 widgets, etc. If using conversions, the system will show the conversions on the invoice if used. The system default is set to "No". 51. Show Units Of Measure - Required. Choose an option from the list provided. If "show" is used, all units of measurement will show on PO's, shopping carts, quotes, and invoices. The "hide" value will still track items by a unit of measurement but will not show the output (actual unit of measurement) in the system documents. 52. Show Bin Numbers - Required. This deals with showing bin numbers on PO's and invoices. The system default is set to "Hide". 53. Show Invoice Line Numbers - Required. Choose an option from the list provided. The system default is set to "Hide". 54. Show Deposit Line Numbers - Required. Choose an option from the list provided. The system default is set to "Hide". 55. Show PO Line Numbers - Required. Choose an option from the list provided. The system default is set to "Hide". 56. Show Expense/Receipt Line Numbers - Required. Choose an option from the list provided. The system default is set to "Hide". 57. PO Type Names - Required. These settings help you control what to call your purchase orders, price quotes, and general orders or requests. Don't get hung up on the name "PO" or "Purchase Order". The Adilas system uses PO's to control inventory costing and quantities. This setting helps you rename the PO types to fit your needs. All four values must be unique (different or slightly different). The max is 50 chars per field and a min of 2 chars per field. 58. Recalc Sales Tax - Required. Choose an option from the list provided. The system default is "Checked" or recalc taxes. 59. Recalc Payroll Withholdings - Required. Choose an option from the list provided. The system default is "Checked" or recalc payroll withholdings. 60. Special Line Items - Required. These settings help your application do a couple different things. The show/hide setting will help show specific special line items to all users who have PO, invoice, or quote permissions. The tax settings help categorize what item applies to what category. The payroll settings help your corporation include or exclude certain specials from being part of the payroll and commission structure. The roll call/handling setting deals with the way items are handled after they are invoiced. The default is revenue which helps the items show up on the income statement or P&L. If you choose COGS (show as a negative), the invoice values will show up in the cost of goods sold section of the P&L. Note: If set to COGS, the system will take the invoiced amounts and will times them by -1 to invert them to a negative. The roll call/handling option of expense is similar to the roll call/handling of COGS but it will show the values in the expense portion of the income statement or P&L. Once again, the expense setting will use a -1 to change the values in to a negative amount. There is also an option for unassigned or black hole. This setting allows you to use the special line item but will not show it on the income statement or P&L. This will not hurt any of your numbers and financials unless you start assigning a price that is not $0 to the specials that have this assignment. By default, both part number "Other" and part number "Verbage/Info" are set to unassigned (black hole). If you want them to show up, we recommend that you assign them to the revenue portion of the P&L. Just because it says black hole does not mean that they disappear, it just means that they don't show up for roll call on the P&L. They still exist within the system and are still tied to real invoices and quotes. They will be shown if searched for specifically from the advanced invoice search and on other reports that pull invoice line item values. The only place they are hidden from is the actual P&L or income statement. 61. Specific Unit Name - Required. This is what you call your specific units or serialized units. This is required even if your corporation does not sell these items. The system default is "Specific Unit". The max is 100 chars and the min is 2 chars. 62. Stock Number Settings - Required. These settings help control the naming or main verbage for the specific units. Setting 1 is for the full name of what to call the unit or item. The default value is "Stock/Unit". It has a max of 50 chars and a min of 2 chars. The second setting is the abbreviated name of the stock/unit. The default is "Stock". This field has a max of 25 chars and a min of 2 chars. 63. Make & Model Settings - Required. These settings deal with what to call the make and model fields for specific stock/units. The default caption for the make name is the word "Make". The default for the model name caption is "Model". Both fields have a max of 50 chars and a min of 2 chars each. 64. Inventory & Sub Inventory Type Settings - Required. These settings deal with what to call the highest levels within the stock/unit section. The basic break-down for stock/units goes like this: the main inventory type, sub inventory types, makes, models, and then the actual stock/units (serialized items). Each field, the inventory type and the sub inventory type, has a max of 50 chars and a min of 2 chars. 65. Show Corp On The Web - Required. This setting is a 3-part setting and deals with the online presence. Choose an option from the list provided. Then check or uncheck the correct sub options. Checked means show and unchecked means don't show. 66. Inventory/Web Settings - Optional. These are additional customer webpage settings for the pre-built webpages that are created for you. The top checkboxes deal with a show/hide prices and additional contact info page. The two special web price fields help if you want to call the special web price something special. There are fields for the full name or value and the short name and value. The max number of characters for the full special web price name is 35. The max number of characters for the short special web price name is 20. The bottom field (text field) is where you may enter your main website or homepage. If used, this will create a link back to your own website or homepage from the pre-built customer inventory pages. 67. Advanced eCommerce & Email Settings - Optional. As a note, there are over 20+ admin corp-wide settings for eCommerce, emailing invoices, shopping cart settings, and checkout options. As a note, eCommerce is a level above the general web presence that Adilas offers. Thus, these settings are maintained on the admin or universe level. Contact an Adilas administrator for help. support@adilas.biz To see the help file for the admin settings page, click here. This help file lists a number of the admin settings that are available. 68. Cross-Corp Actions - Optional. Choose from the list provided. The default is "Allow" which means that the system will allow cross-corp actions to take place. If you are worried about security or you choose to use the "Do Not Allow" setting, the system will block all cross-corp actions to your site. Without getting super technical, there are a couple of underlying permissions that govern the usage of cross-corp actions. First off, the receiving corporation has to have this corp-wide setting turned on to "Allow". If not, then no outside actions may be performed. Second, the user must be assigned to 2 or more corporations for the system to let them play. Third, they (the user) must have the correct corresponding permissions in the receiving corp (stock in inventory and/or basic expense/receipts). Basically, this assumes that the user could simply switch corps and do the exact same things from there, but because they have the cross-corp actions permissions turned on, they are able to send from one corporation to another assigned corporation. There is also a top-level system admin permission that is hidden to all users except for administrators. This permission allows for the corporation Adilas.biz to enter monthly billing or expense/receipts without having a valid permission on the receiving side (virtual paperless billing). In short, it skips the dual permission check and allows for billing to any corporation within the Adilas.biz network. This permission is for administrators only and has additional security built in to protect other user corporations from any form of abuse. Every cross-corp action records a history and/or audit trail in case an issue arises. The top-level administrator permission also honors this corp-wide setting for access to a sub corporation. If set to "Allow", actions are allowed. If set to "Do Not Allow", all access is denied. This information is disclosed here to help educate you as to what happens and what options are available. If you have further questions, please contact Brandon Moore - Adilas system specialist - at 435.258.5504 (home/office) or by email at support@adilas.biz 69. Fiscal Year Dates - Required. Use these settings to set up a default fiscal year or financial year. These settings are used on income statement (P&L) and balance sheet. The defaults are Jan 1 and Dec 31. If using a custom date range (not Jan to Dec), make sure to butt the date range up to a perfect one day difference. The from range should be one month higher than the to range. Ex: June 1 to May 31. 70. Ice-Down Date - Required. This is a special date that allows a corporation to ice-down (lock-down) dates in the past. Use the m/d/yy format on all dates. 71. Invoice Due Date - Optional. This is set up in the corp wide settings under invoice due date settings. If the setting is turned on it will allow for invoice due date. The default is no invoice due dates. The second setting is the default number of days to add to an invoice date to get the due date. The default is 15 or add 15 days from the invoice date to calculate the due date. Any number between 0 and 365 will work. Some common ones are 0, 7, 15, 21, 30, 45, 60, etc. |